How to Use a Stovetop Percolator
Fill the bottom chamber with cold water to just below the stem, add one tablespoon of coarse-ground coffee per cup to the basket, assemble the pot, and set it on medium-low heat. Watch for a steady perk through the glass knob, then reduce heat to maintain a gentle bubble for 7 to 10 minutes. Remove from heat, let it sit 30 seconds, and pour.


What a Stovetop Percolator Actually Does
A stovetop percolator works by heating water in the bottom chamber until pressure pushes it up a hollow stem and over a basket of ground coffee. The brewed liquid drips back down and the cycle repeats until the pot comes off heat. Unlike drip machines, the water recirculates rather than passing through only once, which is why percolator coffee tends to be bolder and stronger. Most pots are made from stainless steel, and the heavier gauge models, like the Presto 02811 at 2.9 lb, hold heat steadily without scorching the bottom. Understanding this cycle helps you control strength: a shorter brew means lighter coffee, a longer one means more extraction.
Choosing the Right Grind
Coarse grind is the standard for percolators. A grind similar to coarse sea salt lets water flow through the basket without packing, and prevents fine particles from slipping past the filter into your cup. Avoid pre-ground espresso or any fine grind. If you use a reusable basket filter, such as the PP plastic filter on the Medelco 8541895214, a medium-coarse grind still works because the basket mesh is slightly finer. For camp percolators like the Texsport 13215 with its reusable basket, grinding coarser than usual compensates for the longer heat exposure you get on a camp stove or open flame.
Loading and Assembling the Pot
Pour fresh cold water into the bottom chamber. Fill only to just below the bottom of the stem or to the marked fill line. Add one level tablespoon of coarse-ground coffee per 6-ounce cup to the basket. A 12-cup pot like the Presto 02811 holds up to 12 tablespoons, but starting with 10 and adjusting on the next brew is a smart approach. Insert the stem and basket assembly firmly so the stem seats fully at the bottom. Set the lid in place. A loose lid or poorly seated stem lets steam escape and disrupts the perking cycle.
Heat Control and Brew Time
Place the assembled percolator on a burner set to medium. On a gas range, a moderate flame directly under the base works well. On an electric coil or smooth-top range, medium-low is usually enough because those surfaces hold heat longer. Watch the glass knob on top. Once you see steady golden-brown liquid cycling through it, typically after 2 to 4 minutes, reduce heat so the perking slows to a gentle, rhythmic bubble. Maintain that low simmer for 7 to 10 minutes depending on how strong you want the coffee. A fully automatic model like the Farberware COMINHKR028441, rated at 1000 watts, manages this cycle internally once set, but on a stovetop you manage it by adjusting the burner.
Pouring and Cleaning Up
Once you pull the pot from heat, give it 30 seconds before pouring. This lets the cycling stop and lets any loose grounds in the basket settle. Pour slowly and steadily. Most stainless steel percolators pour cleanly without grounds in the cup when the basket sits properly. After the pot cools, disassemble the stem and basket and rinse all parts. The Presto 02811 is dishwasher safe, which makes cleanup straightforward. The Farberware COMINHKR028441 is not dishwasher safe, so hand wash the basket and stem with warm soapy water and rinse well. Coffee oils build up quickly in percolator baskets and turn stale if left to sit, so clean after every use.
Scaling for Small or Large Brews
Percolators work best when filled to at least half capacity. Brewing just 2 cups in a 9-cup pot like the Texsport 13215 means less water mass, faster heating, and a higher risk of over-extraction before you can catch it. If you regularly brew for one or two people, a smaller pot is the better choice, and the Medelco 8541895214 at 8-cup capacity with a lightweight 1.58 lb build is practical for small households. For camping, the Texsport at 1.8 lb travels well and pairs with a camp stove or open fire. When scaling up for a crowd, stick to the one-tablespoon-per-cup ratio and extend brew time by 1 to 2 minutes rather than increasing the grind amount.
Common mistakes to avoid
- Using fine or medium grind coffee, which over-extracts quickly and makes the brew bitter. Stick to coarse grind.
- Running the percolator too long. More than 10 to 12 minutes on heat forces the water well past 200 F and scorches the coffee.
- Filling water above the stem base. Overfilling leaves no room for the cycling action and can push grounds into the coffee.
- Starting on high heat to save time. High heat causes rapid boiling, violent perking, and uneven extraction. Medium to medium-low is the right starting point.
- Skipping the 30-second rest before pouring. Pouring immediately stirs up grounds that have not yet settled in the basket.
- Neglecting to clean the basket after each use. Stale coffee oils coat the basket and stem and add off-flavors to every subsequent brew.
Frequently asked questions
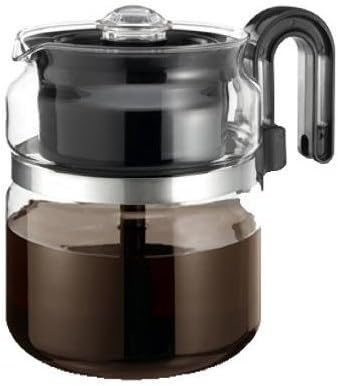
How long should I percolate coffee on a stovetop?
7 to 10 minutes once you see a steady, gentle perk through the glass knob is the typical range. Watch the color cycling through the knob. Light amber means the brew is getting started. Deep brown means it is ready. Pull it off heat before it turns very dark.
What coffee-to-water ratio works best in a stovetop percolator?
One level tablespoon of coarse-ground coffee per 6-ounce cup is the standard starting point. If the result is too weak, add half a tablespoon more on the next brew rather than extending the perk time, which tends to add bitterness rather than strength.
Can I use a stovetop percolator on an induction cooktop?
Only if the pot is made from magnetic stainless steel. Most stainless steel percolators, including the Presto 02811 and Farberware COMINHKR028441, are induction compatible, but check the product specs or hold a magnet to the base to confirm before use.
Why does my percolator coffee taste bitter?
The two most common causes are brewing too long or grinding too fine. Try pulling the pot off heat at 7 minutes instead of 10, and switch to a coarser grind. If bitterness persists, check that the basket and stem are clean, since built-up coffee oils can add harsh flavors.
Do I need paper filters with a stovetop percolator?
No. Percolators use reusable metal or plastic basket filters, and most models include one. The Texsport 13215 and Farberware COMINHKR028441 both come with reusable baskets. Paper filters sized for percolators exist and can reduce sediment slightly, but they are not required for a clean cup when you use a coarse grind.